This tutorial guides you through setting up custom audio prompts in 3CX to personalise your call greetings and busy messages.
1. Introduction
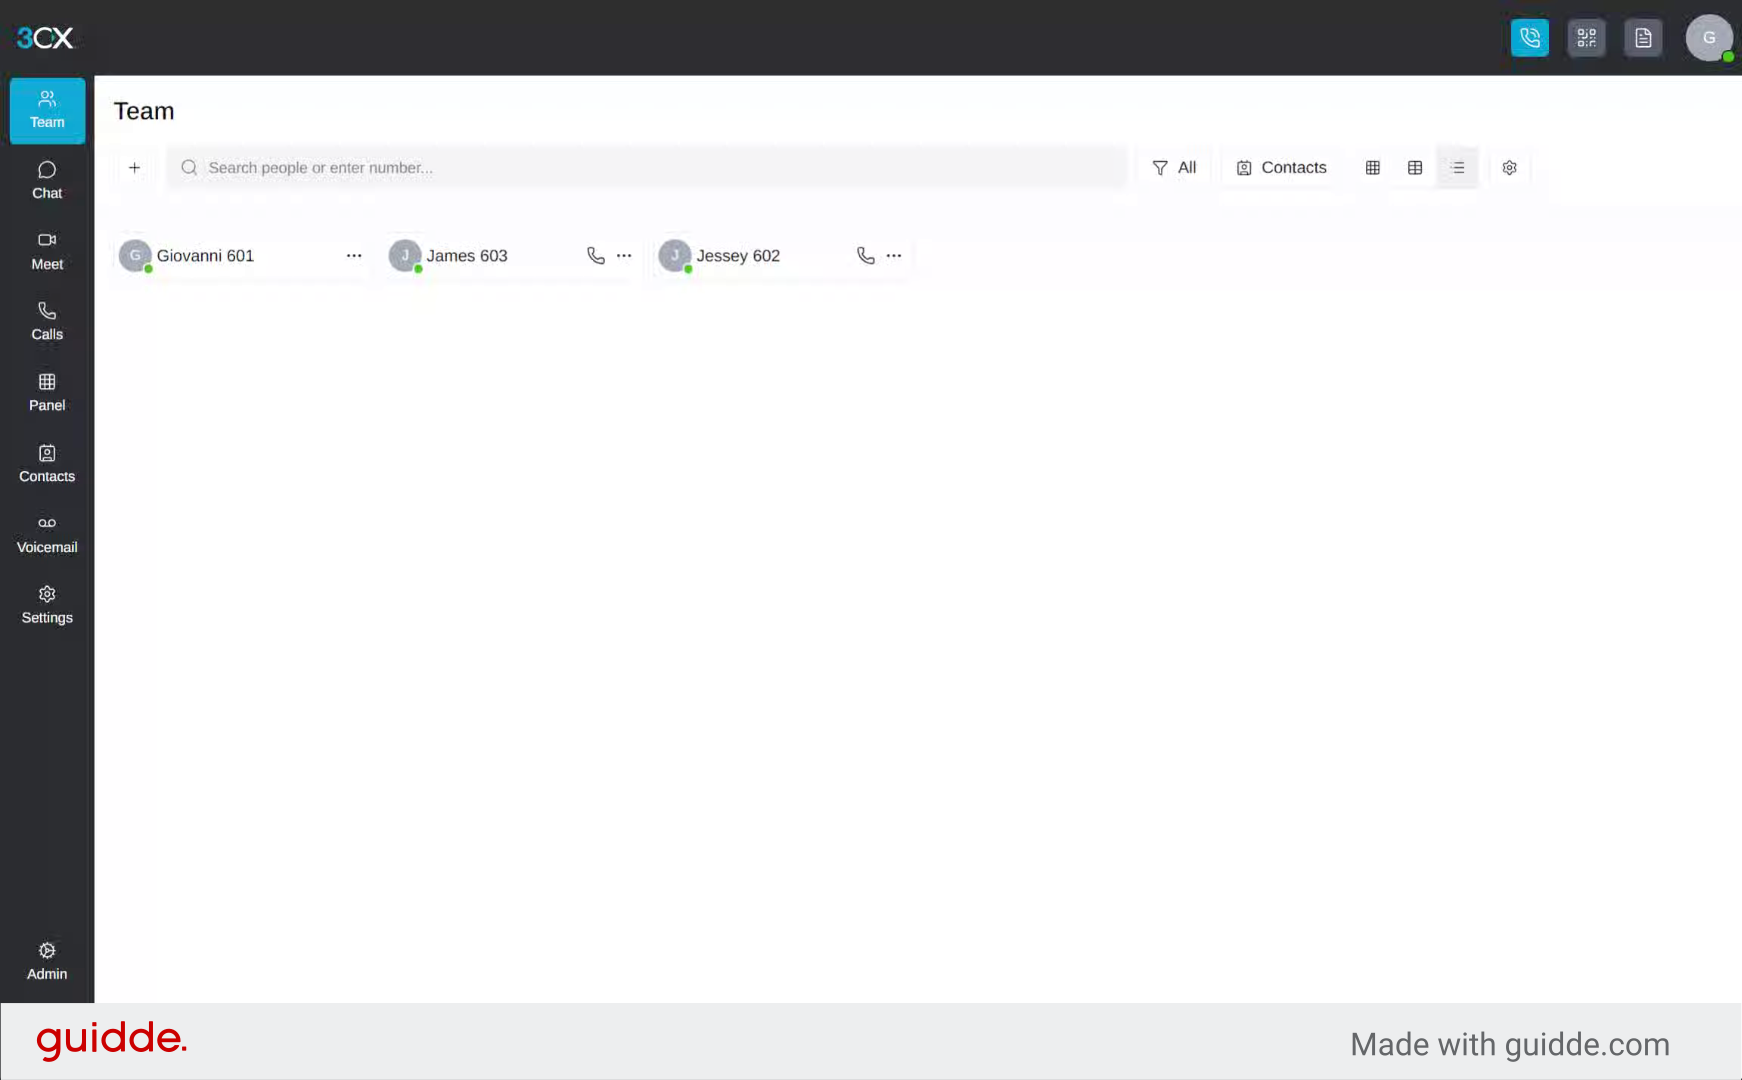
Before starting, ensure you have access to the 3CX Web App.
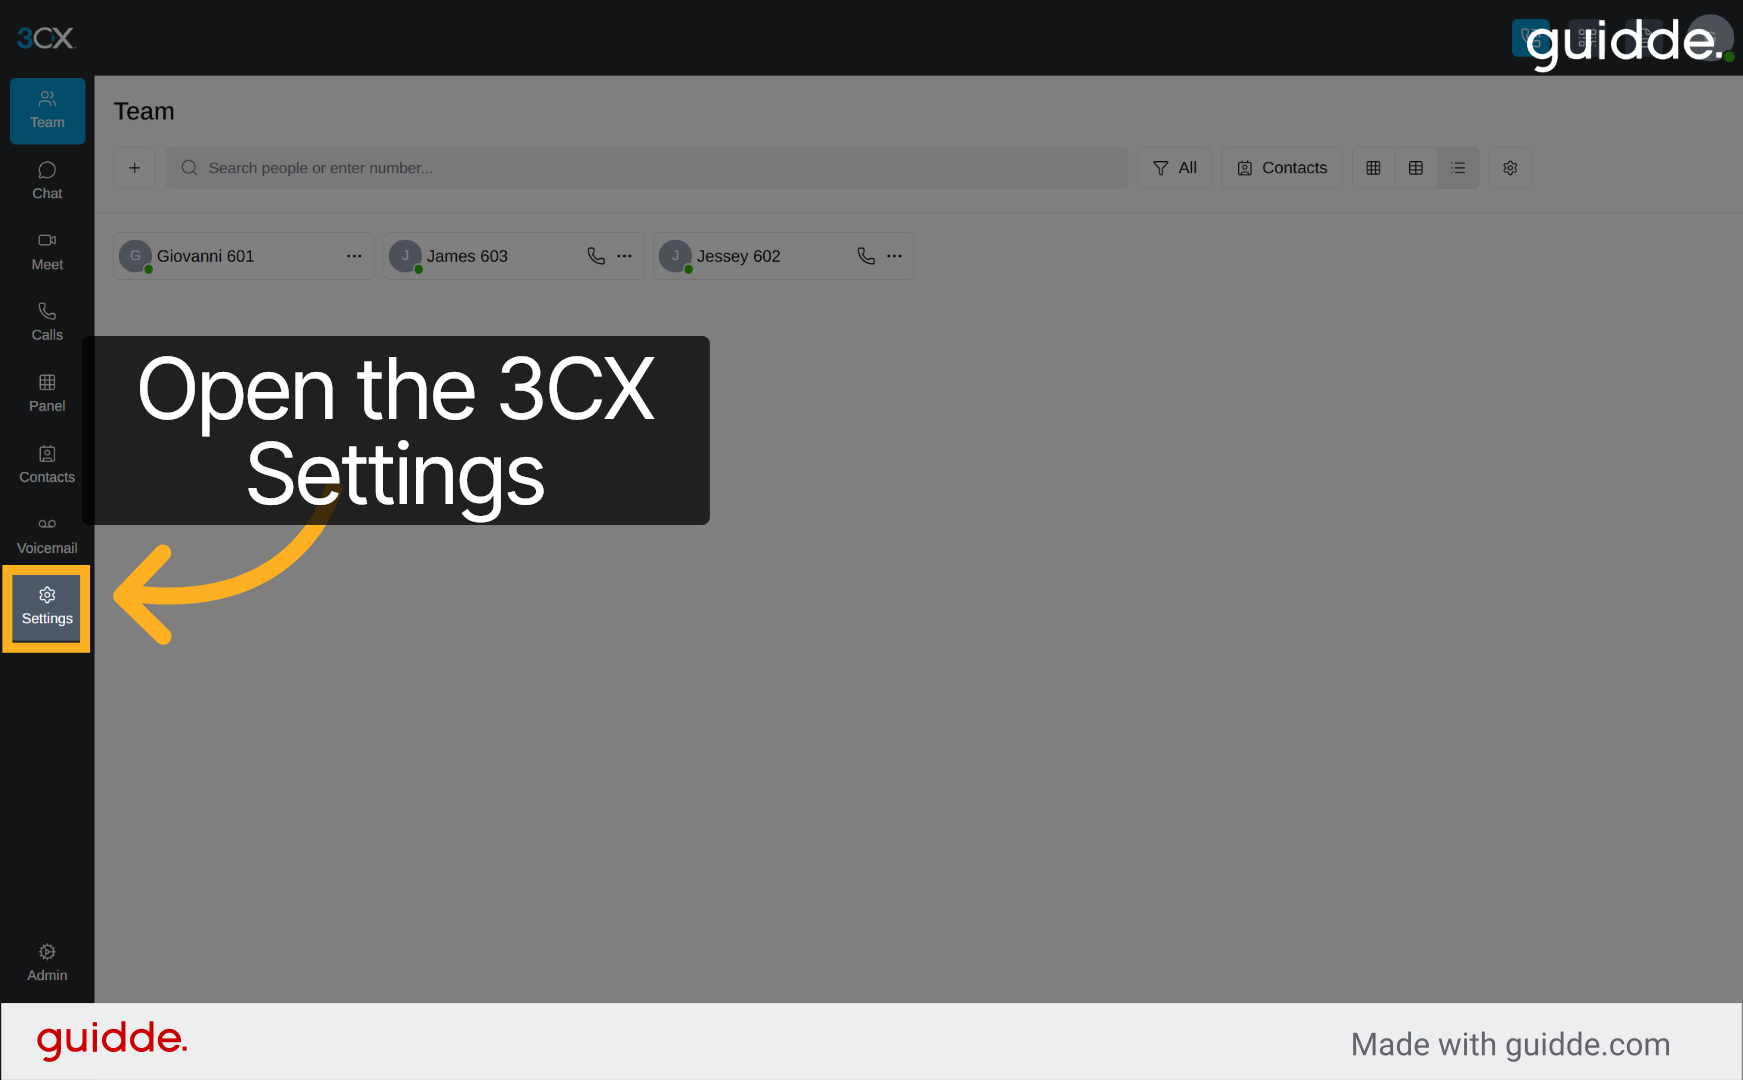
2. Open 3CX Main Menu
Begin by clicking the main menu option in the 3CX application to access the settings area where audio prompts can be configured.
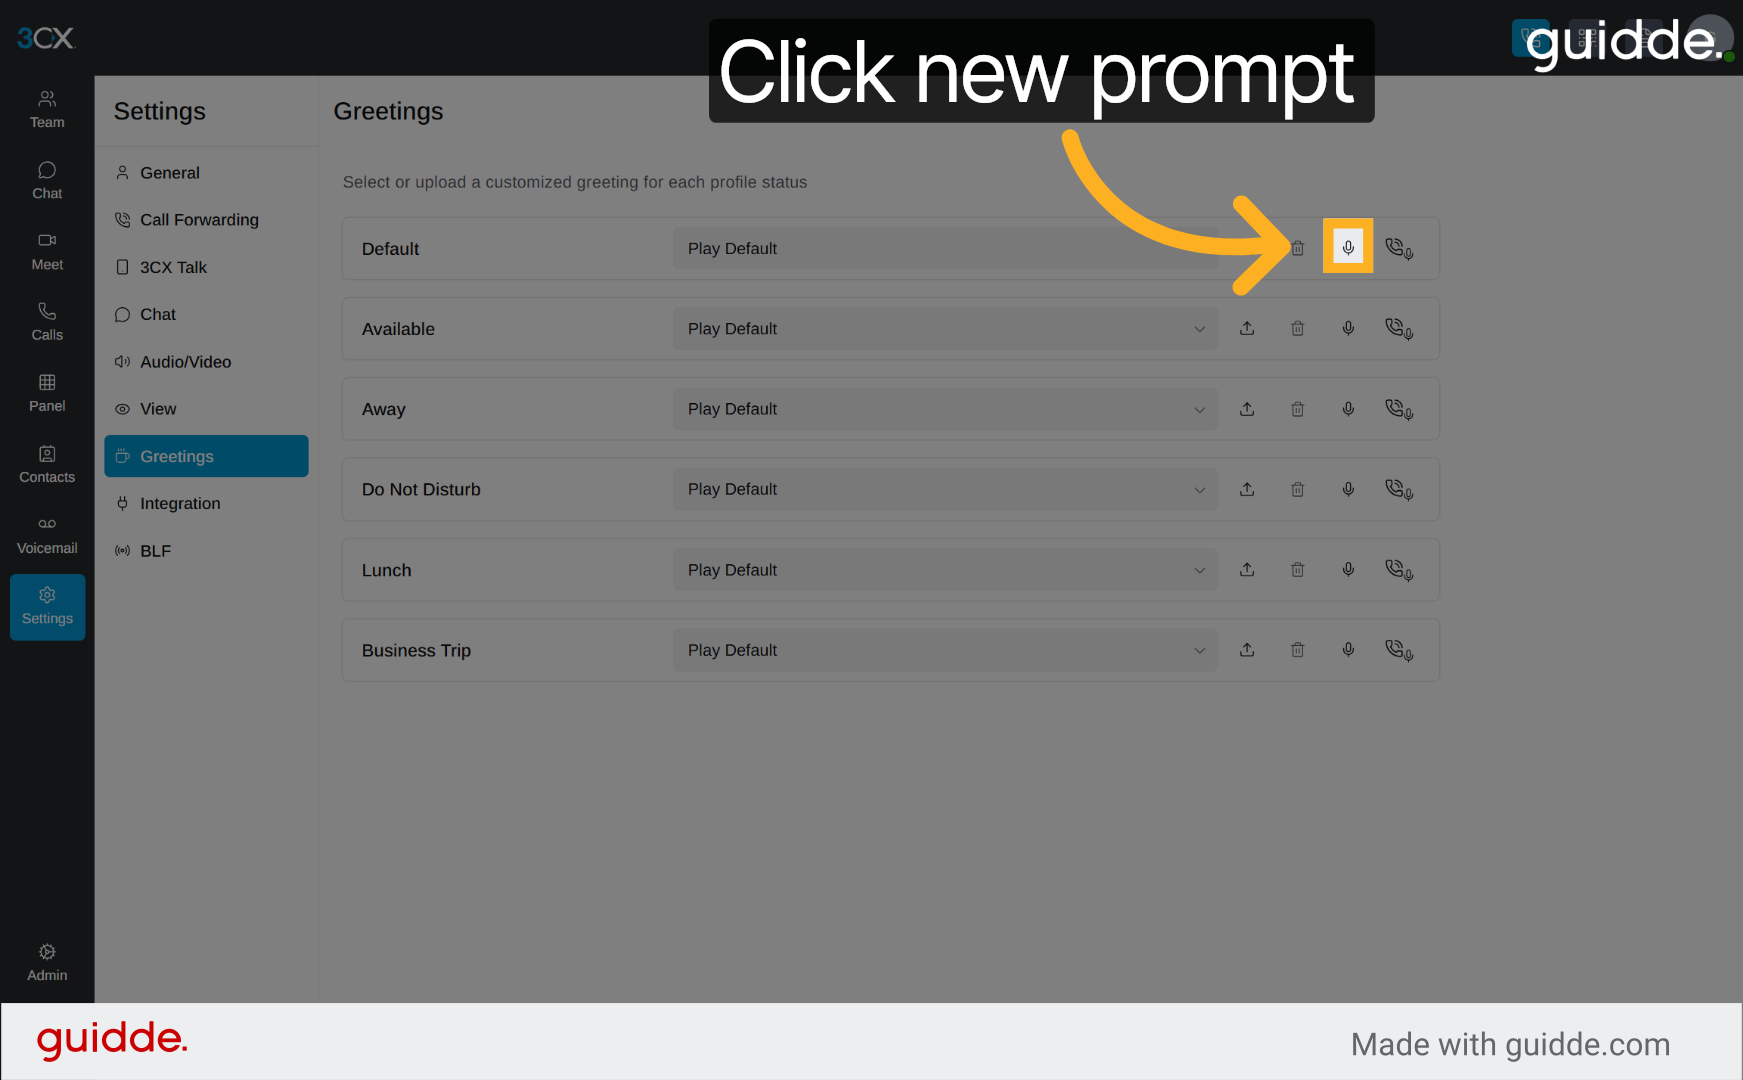
3. Access Greetings Section
Navigate to the Greetings section within the 3CX Settings to manage your call audio prompts effectively.

4. Initiate New Audio Prompt
Click the designated area to start creating a new audio prompt for your call greetings.
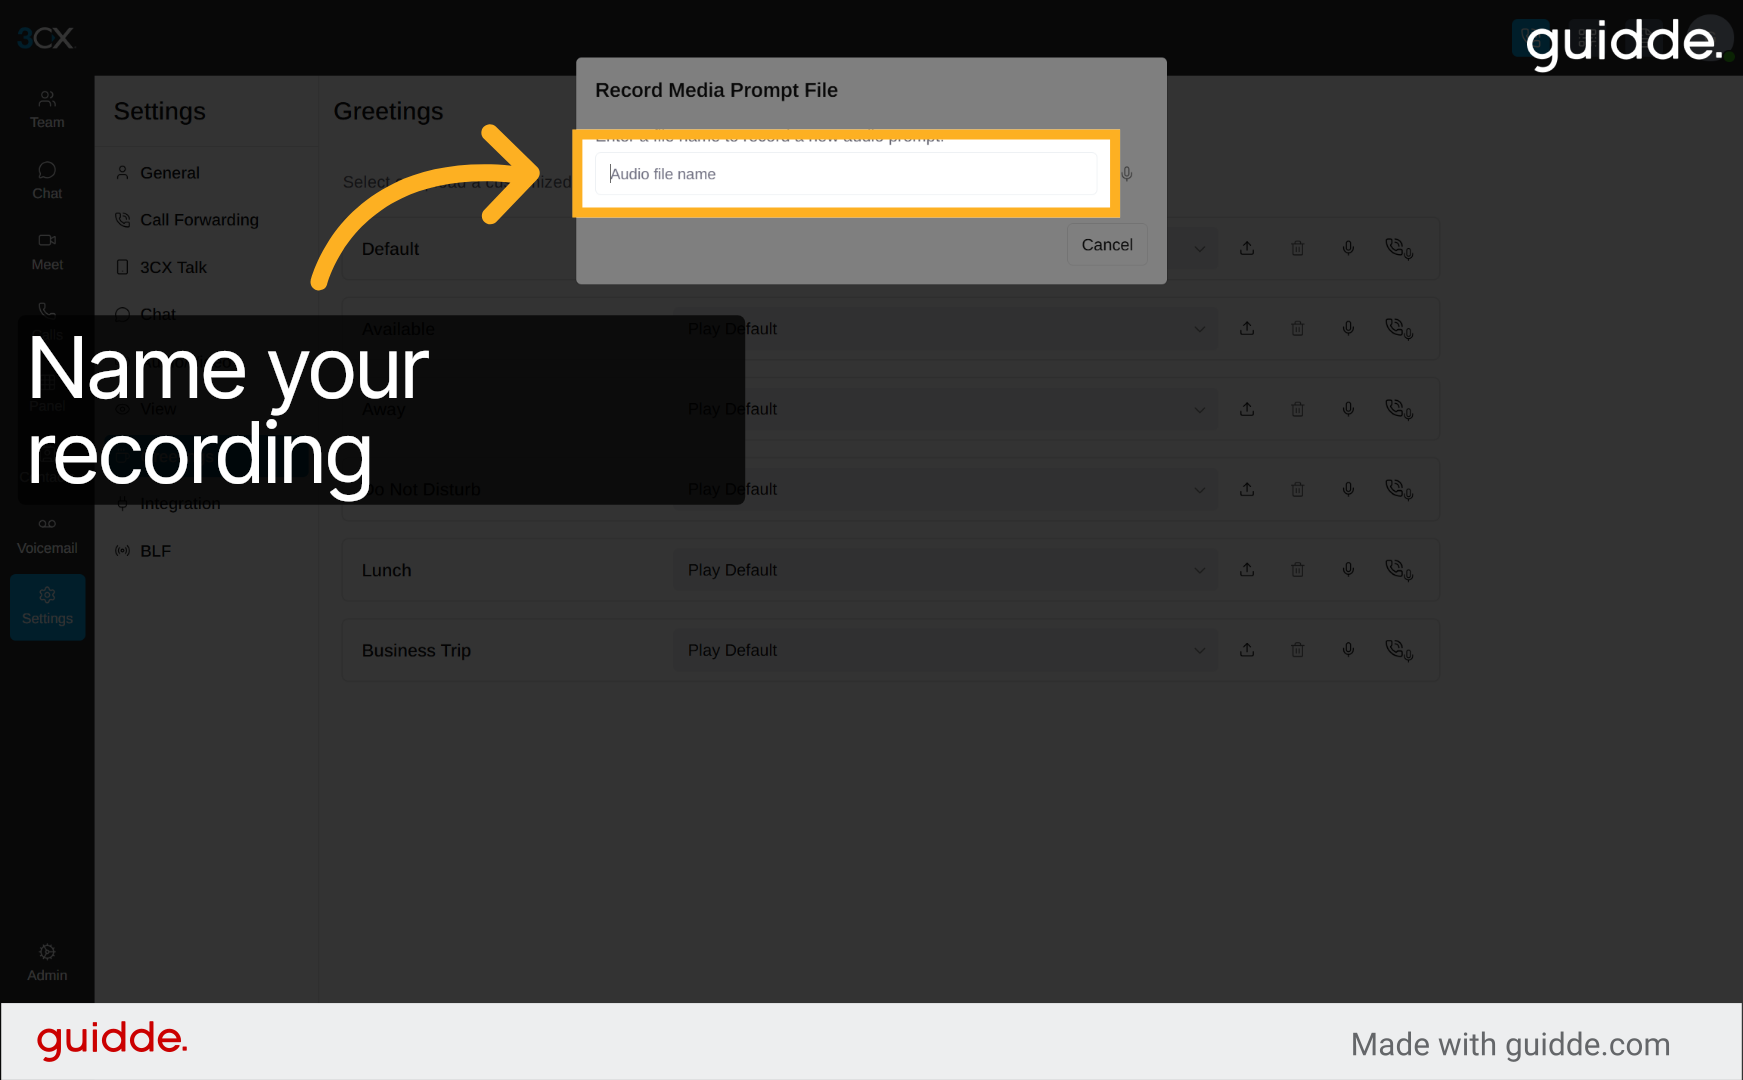
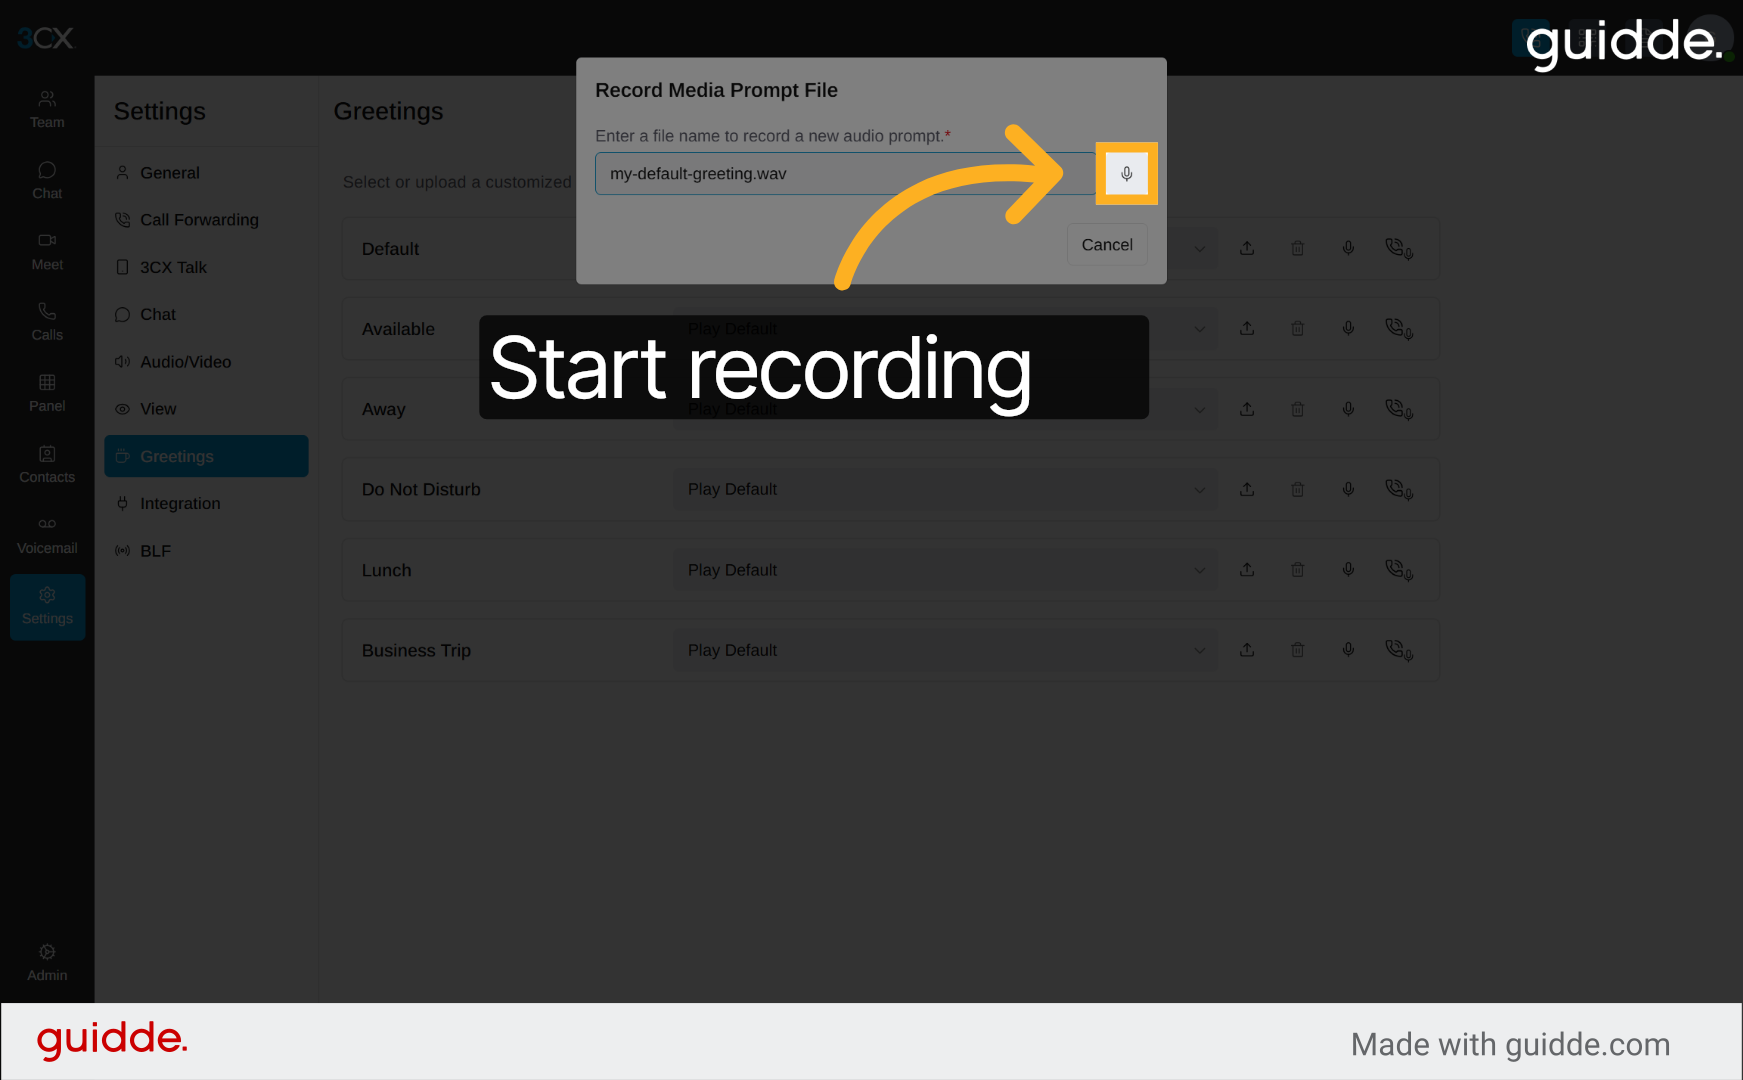
5. Name your file
Click the field labelled 'Enter a file name to record a new audio prompt' to specify your new audio file's name.
6. Start the recording
Click to confirm the file name entry and proceed with recording or uploading your greeting audio.
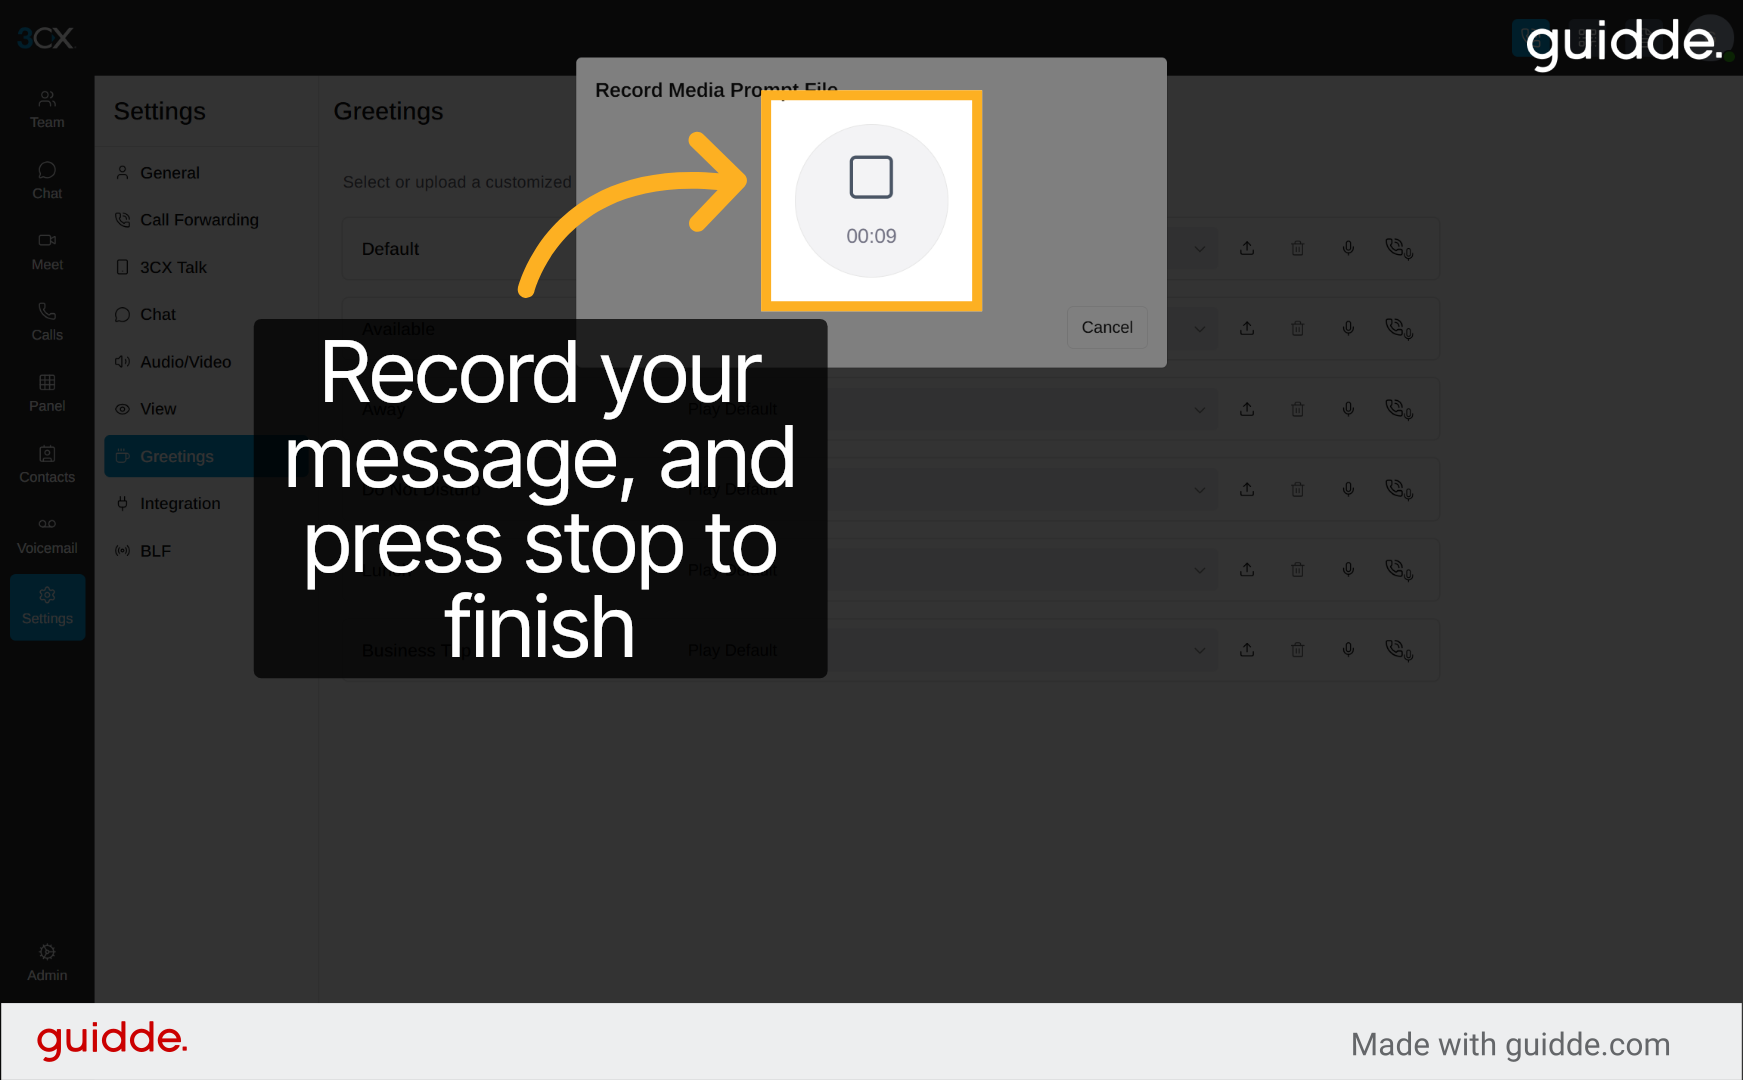
7. Stopping Recording Audio Prompt
Click the button to stop recording your new audio prompt directly within the 3CX interface.
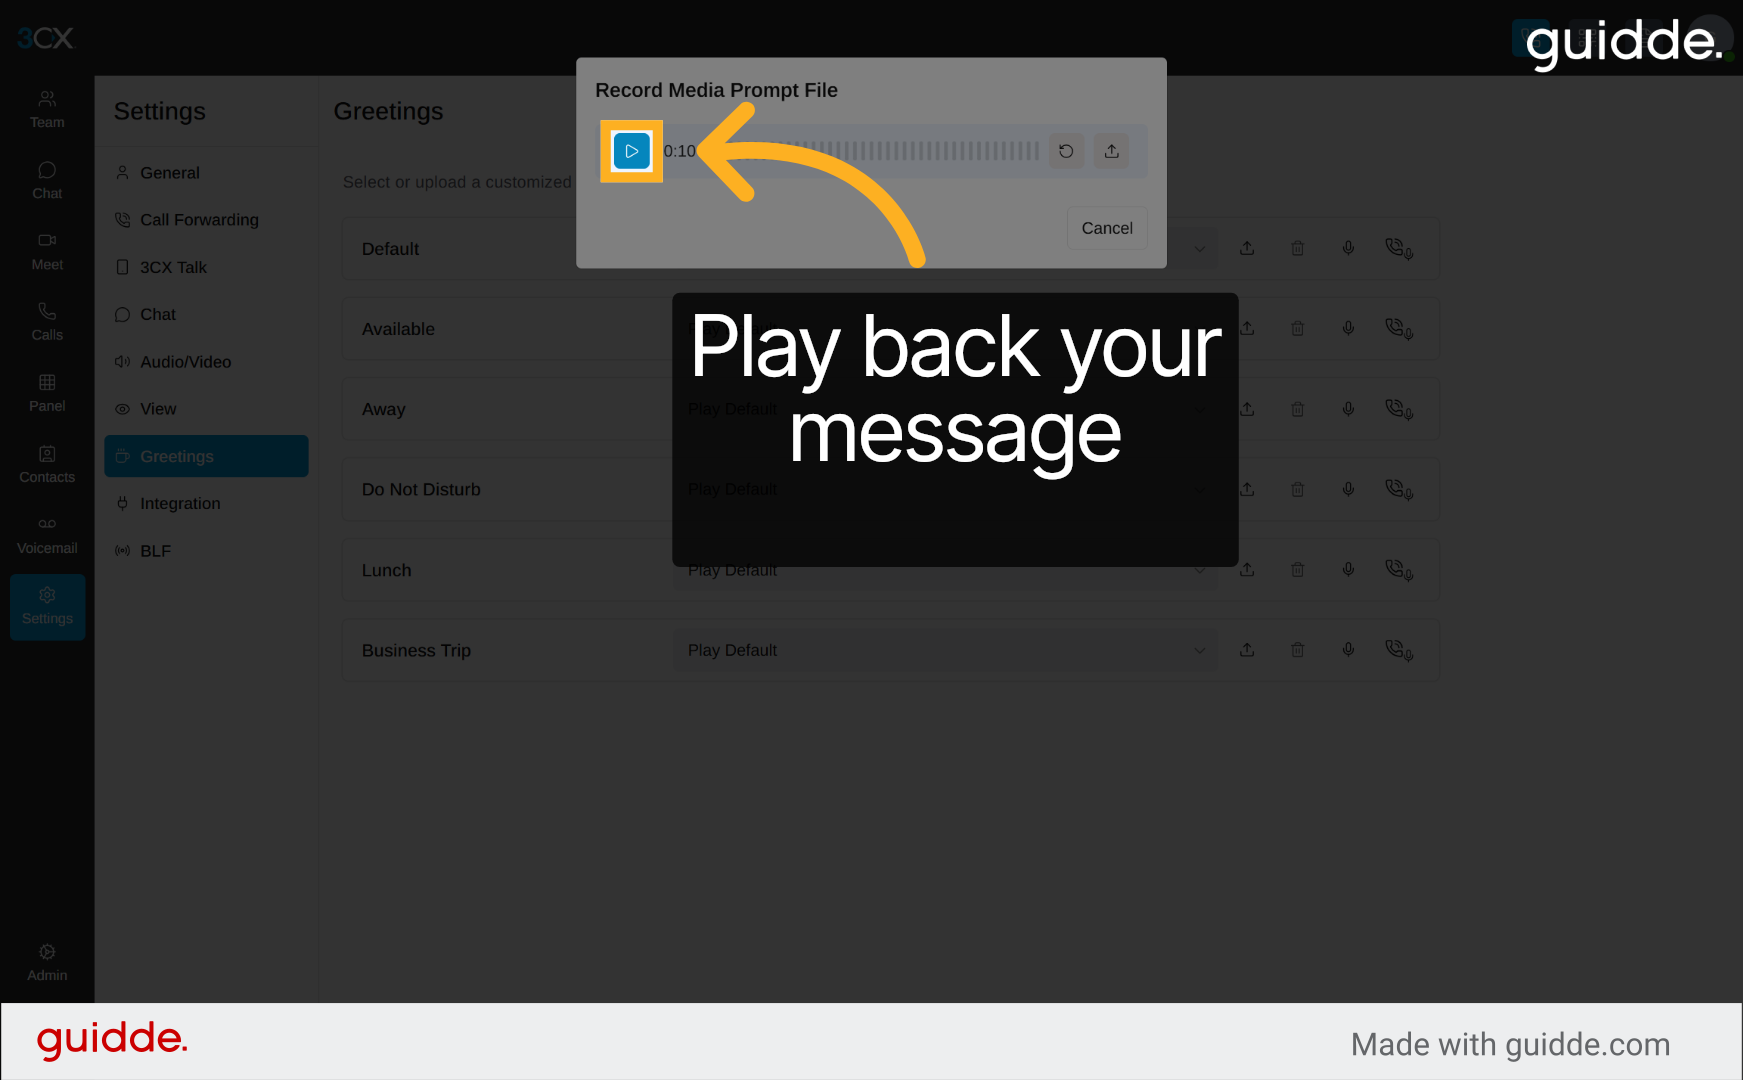
8. Playback to verify your message
Click the stop button to finish recording your audio prompt once you have completed your message.
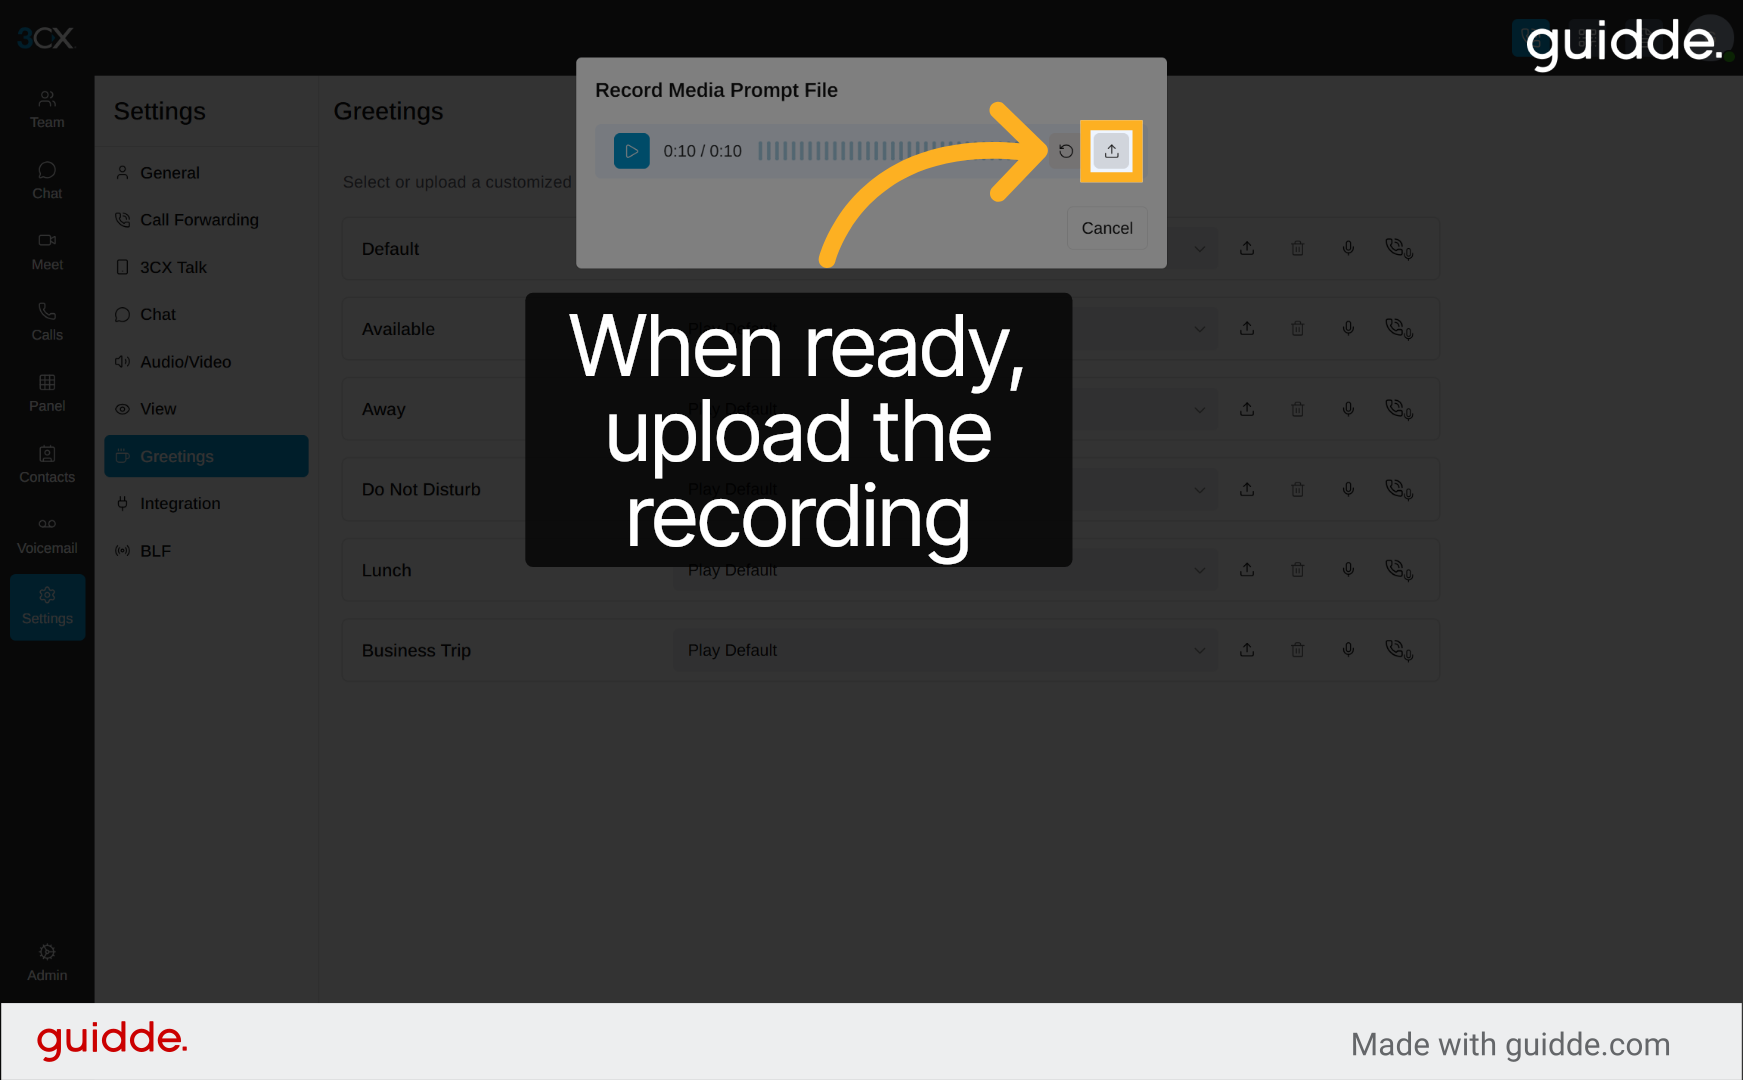
9. Upload your message
Click the upload button to listen to your recorded audio prompt and ensure it meets your requirements.
You have successfully configured custom audio prompts for greetings and busy messages in 3CX. Verify your settings by testing the prompts during calls. For further customisation, explore additional audio settings or consult 3CX support resources.
Was this article helpful?
That’s Great!
Thank you for your feedback
Sorry! We couldn't be helpful
Thank you for your feedback
Feedback sent
We appreciate your effort and will try to fix the article